| Главная |
| Лекции |
| Download |
| Help |
| Ссылки |
| Контакты |
| Help :: Ваш первый проект на PICMicro (eng) | ||
| Your first PICMicro Project | ||
|
After doing two weeks on LCDs, I thought I'd spend a few weeks focusing on the number one question that I get asked; "How do I start working with the Microchip PICMicro?" The question is asked from a variety of perspectives and goals, ranging from somebody that just wants to become casually familiar with the chip to people who want to learn about the PICMicro to students that have been given an assignment to create a project for the device and don't know where to begin. In this article and the two that follow it, I want to present what I consider the necessary information and tools for most efficiently learning about the PICMicro microcontroller and be able to create your own applications.
This week, I will go through what I consider the prerequisites and information that you should have before working with the PICMicro. In the next two articles, I will discuss the different types of programmers available for the PICMicro as well as my own design for a simple 16F84 serial programmer. I will also present what I consider to be a good "first" application along with different ways of implementing it, both from a hardware and software point of view. In these three articles, I will not be spending a lot of time on developing application software for the PICMicro nor will I go into a detailed explanation of how the hardware works. This information can be found either on the web or in the books that I reference later in this article. To start off, rather than going through a history of the PICMicro device, I want to introduce it with a few comments. First off, you may see the Microchip PICMicro referred to as the just the "PIC". In 1997, Microchip registered the name "PICMicro" for its line of microcontrollers. I suspect that this was done to avoid confusion with other devices which are known as "PICs" (one of the most prevalent is the "Peripheral Interrupt Controller" chip (the 8249A) used in the PC). I'm mentioning this because as you look for information on the PICMicro, you will probably it referenced as both the "PIC" and "PICMicro" for all intents and purposes the two names are used to describe the same device.
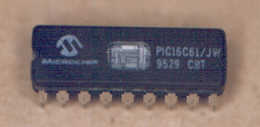
The most popular PICMicro used to teach new users is the 16F84. This device uses a "mid-range" PICMicro processor, with 1024 instructions of "Program Memory" and 68 bytes of Random Access Memory ("RAM") memory (which are also known as "file registers"). The "Program Memory" is made up of a serially programmable array of "Electrically Eraseable Programmable Read Only Memory" ("EEPROM") cells which can be serially programmed by the user. Internally to the chip, there is a timer, an interrupt controller and 64 bytes of EEPROM that can be used for data storage. The chip itself comes in an eighteen pin package with thirteen pins available for digital input and output. The photograph at the top of this article is of a PICMicro 16C61 which is roughly equivalent to the 16F84, but uses EPROM program memory instead of EEPROM. The 16C61 chip shown above is a "JW" part, which is Microchip's designation for the parts which have "windows" for allowing UV light to be used to erase the program memory's contents. Just a point to help stem confusion later. The Microchip microcontrollers which have electrically erasable reprogrammable memory (which I sometimes call "Control Store") are described as having "Flash" program memory. This isn't quite true as "Flash" is a technology where blocks of memory are erased and then programmed. The Microchip parts can have any instruction address changed (including erased) without affecting any other addresses. This configuration of electrically erasable programmable memory is really "EEPROM" and you'll see some people become irate over the idea that Microchip calls their EEPROM devices "Flash". When the microcontrollers are programmed, the program memory is normally erased in one fell swoop which makes the operation similar to that of "Flash". There are three PICMicro families. The "low-end" is a family of devices which use a simple processor which executes an one of 33 twelve bit instructions. The low-end processor can "call" subroutines, but it is important to note that only two levels of "nesting" is possible with this device. In earlier books and PICMicro references, the low-end devices (most notably the 16C54) were used as the primary learning tools. Many of the low-end devices used in applications can (and should) be substituted for mid-range devices such as the 16F84 for most teaching situations. The low-end device part numbers are in the format: 16C5xx. The reason why I suggest that the 16C54 is not used for learning about the PICMicro is it's use of "Erasable Programmable Read Only Memory" ("EPROM") instead of the EEPROM of the 16F84. EPROM requires purchasing "JW" (windowed) parts and a "UV-Light" EPROM eraser while the EEPROM PICMicros can be erased at the programming station. Another advantage of the 16F84 devices is their use of the "InCircuit Serial Programming" ("ICSP") protocol which allows the mid-range devices to be programmed with a minimum amount of I/O pins used where the low-end devices use a parallel protocol which requires fourteen pins to be accessed. This large number of pins makes it much more difficult to build your own programmer. Mid-range devices have part numbers in the formats: 14000 and 16Cyx(x) where "y" is a number greater than "5". The mid-range devices are the true workhorses of the PICMicro line with quite a variety of different options available. Along with the devices which enhance the low-end with interrupt controllers and several more instructions, they also have such built in hardware Input/Output ("I/O") capabilities as analog input, serial (synchronous and asynchronous) I/O, microprocessor bus interfaces and LCD direct control. Along with these features, the processor has been "tweaked" to allow for more control registers and file registers ("RAM") and utilizes a 14 bit instruction word. The high-end devices have full sixteen bit instruction word processors with somewhat limited I/O capabilities. While having serial I/O capabilities, these devices are primarily designed for applications which require bus memory (RAM and ROM) and can be more difficult to wire than the low-end or mid-range devices in an application. The processor enhancements allow data to be handled more efficiently than in the other two PICMicros, but is somewhat more difficult to develop applications for. Since I wrote "Programming and Customizing the PIC Microcontroller" Microchip has released some new families of microcontroller devices that are quite interesting. The eight bit 12Cxxx microcontrollers use both the low-end and mid-range architectures with the ICSP programming protocol for programming. Microchip has enhanced the EEPROM program memory devices with the 16F87x series which also offers built in debugging hardware that can be accessed by the new "MPLAB-ICD" emulator. Finally, the high-end has been enhanced with the 18Cxx series of devices (which were code named "Goldengate") which brings many of the advantages of the high-end devices into the smaller packages of the mid-range parts. With this background, I want to go through the background work that should be done to develop your first PICMicro application. The list that I have come up with is: 1. Knowledge prerequisites In this article, I will go through these six topics. Next week, I will present my take on the "COM84" programmer and then end the series of three articles with a simple first application which can be carried out a number of different ways to help you understand how to create your won PICMicro applications. The term "Knowledge prerequisites" probably seems quite awkward, but I think it is the best way to describe the knowledge needed to develop PICMicro applications. Before starting your first PICMicro application, you should be comfortable with the following concepts: - Hex/Decimal/Binary numbering systems These skills, for the most part, are quite easy to develop in a very short period of time and can be enhanced during the development of the first application. Programming skills should not be learned "on the job" because you will quickly become overwhelmed with trying to figure out how loops and "if" statements work. Before learning any processor device, I highly recommend that you take a course or work through a programming work book on a high-level language like "BASIC" which will help you to understand how application software is written. The PICMicro is somewhat different in processor architecture than other microcontrollers. In many ways, the PICMicro has one of the best optimized processors for assembly language application code that has to be very fast and very small. But, it is quite different from traditional "Von Neumann" processors like the one in the Motorola 68HCxx microcontrollers. This is not to say that the PICMicro is difficult to learn how to program - I found the process to be reasonably straightforward. I guess the best way to describe the PICMicro processor is that it is very basic and will seem to work at a lower level than you may be use to. The PICMicro is not completely different from other microcontrollers, but it does process data more like the processor is made of individual logic gates than the high level operations of other processors. In "Programming and Customizing the PIC Microcontroller", I approached the PICMicro's architecture from a bit of an usual perspective in that I derived how the block diagram was produced for the part. It is interesting to see that by doing this, the confusing processor block diagram becomes quite easy to understand and data paths during instruction execution can very easily been followed. The PICMicro is extremely well documented on the web with Microchip providing quite excellent Adobe "Postscript" ("PDF") files available for download as well as many very good commercial and enthusiast sites available. Two web sites that I would recommend you look at for PICMicro information is Microchip's microchip.com and my own PICMicro web page (http://www.myke.com/PICMicro). Both sites have a list of additional sites with information, products and sample applications which you can download and look at. There are quite a few books on the PICMicro as well. Along with "Programming and Customizing the PIC Microcontroller", I have also written the "Handbook of Microcontrollers", both of which have introductory information on the PICMicro as well as programming information and sample applications. There are a number of other books available on the PICMicro which are listed at http://www.myke.com/PICMicro/picpage3.htm. Another resource is the "PICList", a "ListServ" ("list server") which is an outstanding resource for questions and answers. Typically, the PICList runs at over 100 email messages per day so you should be prepared to skim through this large volume quickly each day or you will quickly become overwhelmed. Over the years the PICList has been in operation, a number of conventions have come about for sending messages to the list and replying. Information on these conventions as well as instructions for joining the PICList can be found at: http://www.myke.com/piclist. Along with the various Internet information resources available for the PICMicro, the success of the device also comes from Microchip's excellent no-cost software development tools. The cornerstone of these tools is "MPLAB". MPLAB is an "Integrated Development Environment", which is to say it incorporates a Microsoft Windows editor, a PICMicro assembler, a PICMicro application simulator and interfaces to Microchip designed programmers and InCircuit Emulators ("ICEs"). This tool is quite easy to use, is relatively fast (although the simulator could be improved) and the only cost is the time to download it. |
||
 |
||
If you don't want to use MPLAB, then you can use a Microsoft Windows editor (such as "WordPad") and download an assembler, simulator and programmer interface. There are some excellent third party and enthusiast tools available - you can find links to them from my PICMicro links page at http://www.myke.com/PICMicro/picpage2.htm. One excellent third party IDE that I can recommend is "UMPS", in which the digital logic characteristics of devices can be simulated along with the microcontroller. If you read my books, you will find that I will push the importance of a simulator almost religiously. The reason for this is that I find it is easier to run an application in software and debug it as far as I can before I wire the hardware and burn a PICMicro with the code. As part of this philosophy, I also push the idea that the real design and debug takes place on the PC that the code development takes place on. Application debug (other than tweaking) is most inefficient at the hardware level and should be avoided at all costs. This is especially true when you are first starting out with the PICMicro and are trying to figure out why the application doesn't work. In the paragraphs above, you should notice that I use the term "PC" instead of "Workstation". MPLAB and most other development tools work under Microsoft Windows or MS-DOS. This means that if you favorite development tool is something other than a PC running Windows (even if it has a PC emulator like the Mac's "SoftWindows") you may find problems running PICMicro development tools. Rather than fight with trying to get the tools to work, I recommend that you buy a used PC and skip the problems trying to figure out why the code won't run properly. Last year I bought a used 16 MHz 386 with a color monitor for $100 Canadian - about $70 USD. The next item on the list of needed items for developing your first PICMicro application is a programmer. If you spend any time looking through PICMicro web sites, you'll discover a real plethora of different programmers available for the 16F84 (with its serial programming protocol). Most of these programmers are very simple to build and debug and will program a PICMicro very quickly using a standard PC. Next week, I will show a very simple 16F84 programmer that connects to a PC's parallel port. If you are looking at built and tested programmers, I can recommend the Microchip "PICStart Plus" which is a reasonably inexpensive programmer which can program all of the different PICMicro devices. If you're looking for a programmer that will work for more than just PICMicros, you should look at the Needham brand of programmers which can program a variety of different microcontrollers as well as EPROMS, Flash chips and serial EEPROMS. As another option, you can look at my "YAP" (which was presented in "Programming and Customizing the PIC Microcontroller") that is designed for beginners working with the 16F84. The kit is available from Wirz Electronics along with all the parts necessary to work through the "Experiments" chapter of the book. Once you have decided upon the programmer, you will have to get together a bunch of parts and prototyping system for building your own circuits. Like most engineers, when I design circuits, I try to reuse parts and sub-circuits that I am familiar with. This means I suggest that you get, along with the PICMicro 16f84, a collection of LEDs, 220 and 4.7K Resistors, 0.1 uF caps for decoupling, some switches and miscellaneous parts for different applications. For clocking, I prefer to use ceramic resonators with built in capacitors, but these can be substituted for crystals and external capacitors as is shown in the diagram below:
For this circuit, I have shown a crystal/capacitor arrangement. Unless different clock frequencies are required, I tend to use a 4 MHz crystal with 27 pF capacitors. The PICMicro uses four clock cycles for each instruction cycle; this crystal gives an instruction speed of 1 MHz which makes timing delays easier. For initial applications, I suggest something like the spring loaded "bread boards" which can be bought quite cheaply at a variety of sources including "Radio Shack". Actually, all the parts that you will initially use, except for the PICMicro can be bought off the shelf at "Radio Shack". The bread board and parts can be bought for $20 or less. The bread board will allow easy build/tear down/modify of your initial circuits and avoid the hassle of soldering while you are still working at understanding what you are doing. This type of prototyping should be good to up to 10 MHz without any concerns. One part that tends to be overlooked by people starting to work with the PICMicro is providing power to your creation. I use a 1 Amp bench supply that I bought from a surplus store years ago. You can also create your own power supply using a "Wall Wart" (wall power adapter) and a 78L05 voltage regulator with a couple of caps. If all else fails, you can use three alkaline "AA" radio batteries wired in series and use the 6 volts out to drive your circuit. The PICMicro should work quite well from the high of 6 volts to the "degraded" 4 volts as the charge in the batteries are used up. Once you have your knowledge, tools and parts in place, the last thing you have to worry about is the first application that you are going to build. About fifty percent of the questions I get asked are from people that already have a complex application in mind and want a few pointers to get them in the right direction. When somebody comes to me with this type of request, I usually tell them that their project is a good goal to shoot for, but before they start working on it they should attempt something much simpler. Making an application which simply turns on an LED is a good start because it demonstrates that the PICMicro was programmed correctly and "core" circuit works. That doesn't mean you can't keep an eye on the ultimate project, just that I think you should take some small steps to get there first. Myke The text and drawings are Copyright © Myke Predko,
1999. |
||
|
|
||
| Design by Krj Support by Barmaley Content by Leosya |